We still have a lot to discuss about completing our monocoque stealth trailer build, but before we move on, I want to spend a minute discussing propane safety.
This past week, a lot of you probably read about the bikini barista who died in a tiny trailer propane fire in Washington. The primary cause was reported to be storing her propane tank inside the trailer.
According to the US gov statistics, there is at least one trailer fire involving propane every single day. Most of these are fatal, because they are intense and in a very closed space. The heat, flame, and toxic gasses involved in a propane fire in such close quarters are extremely lethal. Many of them involve improper storage of the propane bottle, like that of the barista we were discussing above. Obviously, a girl in a bikini didn't want to go outside in winter to deal with changing a propane tank- it's frikkin' cold, right? This same situation happens in duck blinds, ice-fishing trailers, and many other enclosed spaces that people live in, like a tiny house or stealth trailer situation. The tank's more secure inside, it's less noticeable, it's cold as hell outside...surely those are the biggest concerns when you are ninja camping....
Actually, federal law prohibits storing propane cylinders above 1 pound in any living space, and the main reason is fire safety and explosion risk. A police officer or trooper stopping you and glancing inside such a trailer can and will cite you on the spot and refuse to allow you to even move the trailer until that cylinder is removed from inside the trailer box.
No doubt, our deceased barista thought she was being safer (and warmer!) keeping her tanks indoors, but the fact is, enclosed spaces allow explosive gasses to build up quickly when changing tanks or lighting a burner. Small leaks (especially in rubber hoses like the Little/Big Buddy's lines) are all too common. An explosion can result. And if a tank or gas line catches on fire, the blowtorch-like jet of flame is all too likely to block your immediate exit from the trailer, even as it ignites everything in the box.
The tanks are far safer stored outside, no matter how annoying it is to swap them. If security is a concern, lock them up or chain them. A pass-through panel in a wall may allow you to turn on the exterior tank from inside or to reach the tank with a wrench, enhancing your safety. Be sure that your propane tank storage position is correct in terms of venting gas in an emergency.
But no matter how tempting it is to keep storing the tanks inside, rethink your design at the first opportunity and move them out.
Your life depends on it.
Tags: Propane safety, Propane tank, Heater safety, Tiny trailer safety, Tiny house safety, Stealth trailer safety, Boondocking trailer safety.
Tuesday, January 19, 2016

Friday, January 8, 2016
The basic tiny stealth house is half complete - working inside a shell without drawing attention
If you are pressed for time, the tiny stealth house we have described so far is now usable to a limited extent. It's rough, but functional.
Keep in mind that you have no storage yet other than a few shelves in back, No bed frame or seating, you still need to weatherproof the door and maybe where panels attach to the floor, no painting has been done yet, no interior wiring or solar yet, Floor work remains, no heating....
Nevertheless, it's functional.
This is the point at which we started using the shell. When I decided to paint the interior, the matress and other contents were dumped onto a tarp on the ground, and I stepped inside and painted it. Likewise, when I built the folding bed and installed the storage cabinet, I had to empty the shell again to make the room to work. Renting a storage unit simplifies this process, gives you a place to work if your existing living space isn't really available for the build, and lets you stage the supplies you will be using in a secure place. A friend's garage is a good fallback position.
Get the shell painted as fast as you can, because it's hard to work inside without getting paint everywhere, including on yourself. I see a lot of people going for a bare wood finish in their tiny house for style points, but it's important to remember that our boondocking trailer is small and good lighting is an issue. Painting it white or a similar bright color inside maximizes your available ambient light from the skylight, and stretches your interior electric lighting farther.
Get your bed up off the floor as soon as you can. The floor has air moving under the deck, so it's always going to be colder then the room proper. If you are cold, you will burn more propane, and it's an avoidable waste.
If you are burning propane in a little buddy or something similar, there's always the chance of minor CO buildup, and it accumulates down at the floor, so being up on a bed frame with a CO detector down there is a strong safety measure.
Finally, the storage space under the bed/couch is significant, and once the bed is off the floor you probably won't have to empty your tiny house again to do any remaining part of the build.
Keep in mind that you have no storage yet other than a few shelves in back, No bed frame or seating, you still need to weatherproof the door and maybe where panels attach to the floor, no painting has been done yet, no interior wiring or solar yet, Floor work remains, no heating....
Nevertheless, it's functional.
This is the point at which we started using the shell. When I decided to paint the interior, the matress and other contents were dumped onto a tarp on the ground, and I stepped inside and painted it. Likewise, when I built the folding bed and installed the storage cabinet, I had to empty the shell again to make the room to work. Renting a storage unit simplifies this process, gives you a place to work if your existing living space isn't really available for the build, and lets you stage the supplies you will be using in a secure place. A friend's garage is a good fallback position.
Get the shell painted as fast as you can, because it's hard to work inside without getting paint everywhere, including on yourself. I see a lot of people going for a bare wood finish in their tiny house for style points, but it's important to remember that our boondocking trailer is small and good lighting is an issue. Painting it white or a similar bright color inside maximizes your available ambient light from the skylight, and stretches your interior electric lighting farther.
Get your bed up off the floor as soon as you can. The floor has air moving under the deck, so it's always going to be colder then the room proper. If you are cold, you will burn more propane, and it's an avoidable waste.
If you are burning propane in a little buddy or something similar, there's always the chance of minor CO buildup, and it accumulates down at the floor, so being up on a bed frame with a CO detector down there is a strong safety measure.
Finally, the storage space under the bed/couch is significant, and once the bed is off the floor you probably won't have to empty your tiny house again to do any remaining part of the build.
Wednesday, January 6, 2016
Trailer Exterior Lights: the most common trailer problem
The single most common problem with trailers in general is the rear lights. Trailers and automobiles typically use a frame ground. Cars are enclosed, so a ground to the chassis typically causes fewer problems.
But trailers, especially kit trailers, use an exposed wiring harness and they ground to the frame.
The wiring and the frame are exposed to the weather, road salts, corrosion, excessive vibration and foreign object damage. Inevitably the connections suffer and the lights begin to fail. If we are trying to boondock camp in our trailer or ninja camp in town, we don't want to draw the wrong kind of attention from the Law. Being stealthy means NOT drawing attention, and making every effort to blend in. Tail lights being out is a famous way to draw attention from bored cops.
If you have had a light failure even though your voltmeter shows 12v at the socket, you've been on the receiving end of one of these problems. Running a new ground to the attachment point of the light from the harness plug will probably fix the issue.
Much of these problems can be mitigated by switching to lower-current LEDs, and enclosing the wiring in flexible conduit when you run the harness for the trailer. While you are at it, run a separate ground wire (white) to each rear light from the harness plug.
 In this case, I ran flexible conduit to the rear and to the opposite side of our tiny house trailer. All of the trailer exterior lighting that connects to the tow vehicle is below the deck. All of the interior power runs are in conduit above the trailer deck. I'll discuss the details of the dual-voltage interior wiring and lighting in a few future articles,but for now we will stick to the standard trailer lights.
The goal was to have no accidental cross-connections to the interior power circuits and to be able to inspect or work on the exterior lighting without having to tear into the structure or pull up the decking and insulation.
In addition, I built a removable rear panel and needed the rear lights to be capable of disconnecting from the harness to make access and repair easier.
 The enclosed lower half of the deck before I laid on the side panels and sealed up the deck side trusses. The circuit boxes are bolted to the back half of the tongue frame supports through existing holes in them, which made things easier. The 1/4 ply just slid under the boxes and was bolted to the frame cross members, and any previously cut zip ties for the conduit were replaced.
Once I got around to installing the lights, I replaced the cheap incandescent lighting with LEDs. The LEDs will run on far less power (so issues like corrosion will matter less) and burn out less often.
Tags: Trailer light issues, Stealthy tiny house, Boondocking trailer, DiY exterior lights, DiY trailer lights, Stealthy trailer lights, Avoiding trailer light issues, Most common trailer problems, Wiring trailer lights, trailer light conduit.
But trailers, especially kit trailers, use an exposed wiring harness and they ground to the frame.
The wiring and the frame are exposed to the weather, road salts, corrosion, excessive vibration and foreign object damage. Inevitably the connections suffer and the lights begin to fail. If we are trying to boondock camp in our trailer or ninja camp in town, we don't want to draw the wrong kind of attention from the Law. Being stealthy means NOT drawing attention, and making every effort to blend in. Tail lights being out is a famous way to draw attention from bored cops.
If you have had a light failure even though your voltmeter shows 12v at the socket, you've been on the receiving end of one of these problems. Running a new ground to the attachment point of the light from the harness plug will probably fix the issue.
Much of these problems can be mitigated by switching to lower-current LEDs, and enclosing the wiring in flexible conduit when you run the harness for the trailer. While you are at it, run a separate ground wire (white) to each rear light from the harness plug.

The goal was to have no accidental cross-connections to the interior power circuits and to be able to inspect or work on the exterior lighting without having to tear into the structure or pull up the decking and insulation.
In addition, I built a removable rear panel and needed the rear lights to be capable of disconnecting from the harness to make access and repair easier.

Once I got around to installing the lights, I replaced the cheap incandescent lighting with LEDs. The LEDs will run on far less power (so issues like corrosion will matter less) and burn out less often.
Tags: Trailer light issues, Stealthy tiny house, Boondocking trailer, DiY exterior lights, DiY trailer lights, Stealthy trailer lights, Avoiding trailer light issues, Most common trailer problems, Wiring trailer lights, trailer light conduit.
Monday, January 4, 2016
Attaching the 'ladder rack' and roofing the trailer
On top of the roof we will be putting solar panels, so we will want a rigid attachment point for security reasons. Solar panels also perform up to 60% better if they can stay cool, so raising them up off of the roof is a smart move. Making them less noticeable is a good idea as well. The best way to mount them is on a ladder rack.
Rather than buy a roof rack, I salvaged some galvanized superstrut type B steel struts from a local junkyard, cut them into uprights and crossbars and then painted them white. They were fitted with end plugs and bolted onto the trapeze before putting on the roof. The solar panels will be bolted to superstrut stringers that rest on the ladder rack and are bolted there. We will go into more detail on the solar electrical system later, but it's important to understand the need to bolt on the ladder rack uprights before fitting the roof.
A watertight roof is critical to the trailer's longevity, safety and comfort. There are hundreds of amp-hours worth of batteries in here, clothes and bedding, and a propane heater. Basically a tiny house trailer is a big pile of kindling and accelerators, all in one, so keeping it dry is a large part of keeping it safe.
Wood also loses strength quickly when wet and rots, which is a common trailer killer.
For our build, I made a double layer of the skinned 2" foam, giving us a 4" R-27 roof. Each layer was attached with heavy duty liquid nails, each joint staggered/lapped to improve the strength and water resistance of the foam even before I applied waterproofing.
At that point I had two options, liquid EDPM compound, or a cold-process roof, both of which tend to be pricey and a little complicated. Alternatives to traditional cold-process roofing exist. To save money, I used returned 60-mil PVC shower pan liners. These are available in 5- and 6-foot widths, and when returned as wrong lengths to the store they are typically sold at about half price. I was able to cover the roof for about $70 with the stuff, bought over a few weeks time, which eased the purchase.
Pan liner is very tough, so wear gloves and cut it with a box knife with a hook blade. I cut and ran a 8" band around the edge of the roof and folded it over onto the roof. This formed a watertight drip edge. Then I laid the top panels onto the roof and lapped them from back to front. This allows water driven along the roof when driving to not be driven into the roof joints. We then overlapped the panel sides down onto the edge band and glued it there, giving me a strong seal. If you are penetrating the roofing with a ladder rack or skylight, I strongly suggest pushing the penetrating material upward through a smaller hole than needed and adding an overpatch for strength. This will give you a tight seal and help roll water away from the joint formed. High quality full silicone caulk will stick to this stuff, and I pumped it under all of the joints in the roofing before gluing any panel down.
Errors:
I made more mistakes on the roof than everywhere else.
The pan liner joints need to be wide, and well glued. I was stingy with glue in a few spots on the deck, and let the glue dry too much before rolling the joints. As a result, I had several dry joints that failed after a good hard rain. The foam panels limited the damage to a few drips. Re-gluing the joints fixed the problem, but I should have checked the joints after a day or two, and I didn't. Laziness can cost you.
My second error was I set the window too low into the roof, flush with the first layer of foam. This meant that in order to avoid a lake on top of the window, I had to run a drain for the top of the window tothe side. After some cussing about getting a watertight drain in place, I said screw it and further covered the triple pane window well with a Lexan sheet laid flat to the top of the roof. I found the sheet for $7 in a hardware store and laid it into a fat bead of full-silicone caulk. 3''x4' Lexan sheets are usually $70, so that was probably the deal of the week. Lexan will protect the window from bad things like hail, and water now runs off of the flush mounted panel instead of accumulating on the window to look for a leak before draining out the pipe I put there.
I do see some minor condensation under the Lexan in cold weather, but nothing major.
I'll post some pics of this later.
Tags:
Rather than buy a roof rack, I salvaged some galvanized superstrut type B steel struts from a local junkyard, cut them into uprights and crossbars and then painted them white. They were fitted with end plugs and bolted onto the trapeze before putting on the roof. The solar panels will be bolted to superstrut stringers that rest on the ladder rack and are bolted there. We will go into more detail on the solar electrical system later, but it's important to understand the need to bolt on the ladder rack uprights before fitting the roof.
A watertight roof is critical to the trailer's longevity, safety and comfort. There are hundreds of amp-hours worth of batteries in here, clothes and bedding, and a propane heater. Basically a tiny house trailer is a big pile of kindling and accelerators, all in one, so keeping it dry is a large part of keeping it safe.
Wood also loses strength quickly when wet and rots, which is a common trailer killer.
For our build, I made a double layer of the skinned 2" foam, giving us a 4" R-27 roof. Each layer was attached with heavy duty liquid nails, each joint staggered/lapped to improve the strength and water resistance of the foam even before I applied waterproofing.
At that point I had two options, liquid EDPM compound, or a cold-process roof, both of which tend to be pricey and a little complicated. Alternatives to traditional cold-process roofing exist. To save money, I used returned 60-mil PVC shower pan liners. These are available in 5- and 6-foot widths, and when returned as wrong lengths to the store they are typically sold at about half price. I was able to cover the roof for about $70 with the stuff, bought over a few weeks time, which eased the purchase.
Pan liner is very tough, so wear gloves and cut it with a box knife with a hook blade. I cut and ran a 8" band around the edge of the roof and folded it over onto the roof. This formed a watertight drip edge. Then I laid the top panels onto the roof and lapped them from back to front. This allows water driven along the roof when driving to not be driven into the roof joints. We then overlapped the panel sides down onto the edge band and glued it there, giving me a strong seal. If you are penetrating the roofing with a ladder rack or skylight, I strongly suggest pushing the penetrating material upward through a smaller hole than needed and adding an overpatch for strength. This will give you a tight seal and help roll water away from the joint formed. High quality full silicone caulk will stick to this stuff, and I pumped it under all of the joints in the roofing before gluing any panel down.
Errors:
I made more mistakes on the roof than everywhere else.
The pan liner joints need to be wide, and well glued. I was stingy with glue in a few spots on the deck, and let the glue dry too much before rolling the joints. As a result, I had several dry joints that failed after a good hard rain. The foam panels limited the damage to a few drips. Re-gluing the joints fixed the problem, but I should have checked the joints after a day or two, and I didn't. Laziness can cost you.
My second error was I set the window too low into the roof, flush with the first layer of foam. This meant that in order to avoid a lake on top of the window, I had to run a drain for the top of the window tothe side. After some cussing about getting a watertight drain in place, I said screw it and further covered the triple pane window well with a Lexan sheet laid flat to the top of the roof. I found the sheet for $7 in a hardware store and laid it into a fat bead of full-silicone caulk. 3''x4' Lexan sheets are usually $70, so that was probably the deal of the week. Lexan will protect the window from bad things like hail, and water now runs off of the flush mounted panel instead of accumulating on the window to look for a leak before draining out the pipe I put there.
I do see some minor condensation under the Lexan in cold weather, but nothing major.
I'll post some pics of this later.
Tags:
Sunday, January 3, 2016
Using a composting toilet and convincing a spouse to use it- the adventure begins
Composting toilets are simple to set up and use, but convincing the significant other can be tough.
You are pooping into a bucket, after all; that can't be sanitary! Getting them to try one in a home setting is the easiest way to demonstrate one without a lot of stress.
To demystify the process, I'm posting some pics from the test run I did for the Missus.
 So first, you need a cover material. I prefer sawdust and wood chips. It's absorbent, spills are easy to clean up, it smells good and stops odor very well.
 Next, you need your buckets, toilet lid that has been prepared, bags and newspaper to line the bags.
I usually toss a layer of paper into the bucket to soften the bottom edges and make it easier to pull the bag out.
 Next you put in a bag, and another piece of paper. Then you insert another bag and paper.
 Into the second bag, put three (3) large cups of sawdust/absorbent/kitty litter/whatever.
 Let the poopin' begin. The seat goes on top and away you go. After each use, you add enough cover material to neither see or smell the waste. This does not require a large amount, only a cup or two.
 When it's full, tie and then knot or tape up the inner bag, then do the same to the outer bag.
 This is the bag you will be tossing in the trash. This is one weeks worth of waste for one person, or perhaps 3 days worth if you are a couple. Notice the already prepared replacement bucket sitting to the right. Always make up the bucket, or without fail you will need it in a hurry and have to cross your legs and make it on the spot.
If you are boondocking, my advice to you is to empty the bucket anytime you have the opportunity, thereby avoiding the need to make a special dump trip. In a semi-permanent setting, you may wait until the bucket's near full, but they are much harder to get rid of in a 'casual' manner the more full they are. In our stealth house, we do this every day in the morning when we get coffee on the way to work and no one notices anything odd about a small but heavy bag of car trash going into the garbage bin at the convenience store.
Tags: Composting toilet, Stealth toilet, Waterless toilet, Camping toilet, Boondocking toilet, Boonie bucket, Wallydocking toilet,
You are pooping into a bucket, after all; that can't be sanitary! Getting them to try one in a home setting is the easiest way to demonstrate one without a lot of stress.
To demystify the process, I'm posting some pics from the test run I did for the Missus.


I usually toss a layer of paper into the bucket to soften the bottom edges and make it easier to pull the bag out.


If you are boondocking, my advice to you is to empty the bucket anytime you have the opportunity, thereby avoiding the need to make a special dump trip. In a semi-permanent setting, you may wait until the bucket's near full, but they are much harder to get rid of in a 'casual' manner the more full they are. In our stealth house, we do this every day in the morning when we get coffee on the way to work and no one notices anything odd about a small but heavy bag of car trash going into the garbage bin at the convenience store.
Tags: Composting toilet, Stealth toilet, Waterless toilet, Camping toilet, Boondocking toilet, Boonie bucket, Wallydocking toilet,
Saturday, January 2, 2016
Composting toilets; the dry camping boondocker's friend
If you are building a tiny house trailer, certain amenities are not really optional. A comfortable place to sit and work or read, a table, a bed, storage space, power...and a toilet.
Any decent tiny house or boondocking trailer build will have a toilet, because you never know where you are going to park it.
Sure, Walmart's got a bathroom, but most of us aren't wallydocking everywhere we go.
A huge number of state and national forests are available to camp in, but there's no bathroom facilities and you are forbidden from digging pit latrines or burying waste in most of them.
And if you are stealth camping in plain sight you can't really haul around tanks of liquid waste without drawing a lot of attention.
The options are flush, chemical, and composting.
Flush toilets are wasteful beyond belief. The tanks and plumbing take up a lot of space and weigh hundreds of pounds. If you have ever have to haul your own water, you will quickly develop a healthy respect for the amount of drinking water a "low volume" toilet wastes in a modern home. Blackwater stinks to high heaven and gets worse over time, and that waste has to be piped out and disposed of at very specific dumping places, which limits where you can empty them.
Not too stealthy, really.
Chemical toilets are more compact and light but require their specific chemicals to work, which are expensive and take up some space, and once again, the waste is not easy to dispose of except at a toilet or dumping area. And of course, it stinks.
So what we have left is the composting toilet. Before I go much further, I'm going to strongly suggest you read the Humanure Handbook. <{----

That link opens up to a page with individual chapters you can read online on a superior form of composting toilet technology, and Mr. Jenkins sells the book as well. It's well worth a read.
Composting toilets have numerous advantages for dry campers. They are light, because the entire toilet is a 5 gallon bucket, a seat, and a box of cover material. The cover material can be sawdust, newspaper, cat litter, or anything else appropriate for your use.
If you are in the wild, you can use a composting bucket liner as the bag lining the toilet. Then it can be dumped into a slit trench and the whole thing will compost in place.
In a public area the bag is topped off with cover material, tied up and tossed into a public trashcan, and is far safer in this use than any baby's diaper bag is - the cover material absorbs the moisture and the smells. The bag goes into the regular waste stream, which allows it to go to the dump and be buried there. The amount of waste generated is very small, on the order of 64 ounces/day, which is nothing compared to a flush toilet. It also doesn't convert gallons of drinking water into shit. It is easily the most environmentally friendly method of waste disposal available. This may all seem outlandish to consider, but my best advice to you is to read the Humanure Handbook, and be amazed.
 Remember this cabinet? This is our composting toilet cabinet, which holds our bucket in the center. The TP and bucket liners store in the space on the left, and the sawdust or other cover material stores in the back bin and pours down a chute into the right bin area.
 This entire bathroom area fits onto the tongue area of the trailer, so it isn't taking up any of our actual living space, and it's completely self-contained. Note that the Bucket is actually too low and had to be shimmed up to just above the deck level so that the toilet seat closed onto it. Raising the bucket up to the seat holds the bags more securely when in use and prevents any wayward urine from splashing over the top of the bucket if your aim sucks. Sitting down avoids this problem, but bad habits are hard to break. Obviously, I waterproofed the deck and the interior, but I prefer to avoid future issues.
 Fitting the seat requires some modification. You need to rotate the seat supports so that they surround the bucket, and you may have to drill new holes and fill in the old holes with epoxy like I did here if the bumpers are press fit rather than screwed in. The end result will close over the top of the bucket and rest lightly on it, holding the bag gently but firmly. You are now ready to take a dump in your ninja tiny house.
Copyright © 2016
Tags: Humanure Toilet, Composting toilet, Boondocking trailer toilet, Tiny house toilet, Dry camping trailer toilet, Shunpiking trailer toilet, DiY composting toilet, Building a trailer toilet, DiY trailer toilet, Ninja trailer toilet, Dry camping toilet, Boondocking toilet, Mobile Eco-communalism, Workamping toilet, Housetrucker toilet, Dispersed Camping toilet, Allstays toilet, Peace convoy toilet.
Any decent tiny house or boondocking trailer build will have a toilet, because you never know where you are going to park it.
Sure, Walmart's got a bathroom, but most of us aren't wallydocking everywhere we go.
A huge number of state and national forests are available to camp in, but there's no bathroom facilities and you are forbidden from digging pit latrines or burying waste in most of them.
And if you are stealth camping in plain sight you can't really haul around tanks of liquid waste without drawing a lot of attention.
The options are flush, chemical, and composting.
Flush toilets are wasteful beyond belief. The tanks and plumbing take up a lot of space and weigh hundreds of pounds. If you have ever have to haul your own water, you will quickly develop a healthy respect for the amount of drinking water a "low volume" toilet wastes in a modern home. Blackwater stinks to high heaven and gets worse over time, and that waste has to be piped out and disposed of at very specific dumping places, which limits where you can empty them.
Not too stealthy, really.
Chemical toilets are more compact and light but require their specific chemicals to work, which are expensive and take up some space, and once again, the waste is not easy to dispose of except at a toilet or dumping area. And of course, it stinks.
So what we have left is the composting toilet. Before I go much further, I'm going to strongly suggest you read the Humanure Handbook. <{----
That link opens up to a page with individual chapters you can read online on a superior form of composting toilet technology, and Mr. Jenkins sells the book as well. It's well worth a read.
Composting toilets have numerous advantages for dry campers. They are light, because the entire toilet is a 5 gallon bucket, a seat, and a box of cover material. The cover material can be sawdust, newspaper, cat litter, or anything else appropriate for your use.
If you are in the wild, you can use a composting bucket liner as the bag lining the toilet. Then it can be dumped into a slit trench and the whole thing will compost in place.
In a public area the bag is topped off with cover material, tied up and tossed into a public trashcan, and is far safer in this use than any baby's diaper bag is - the cover material absorbs the moisture and the smells. The bag goes into the regular waste stream, which allows it to go to the dump and be buried there. The amount of waste generated is very small, on the order of 64 ounces/day, which is nothing compared to a flush toilet. It also doesn't convert gallons of drinking water into shit. It is easily the most environmentally friendly method of waste disposal available. This may all seem outlandish to consider, but my best advice to you is to read the Humanure Handbook, and be amazed.


Copyright © 2016
Tags: Humanure Toilet, Composting toilet, Boondocking trailer toilet, Tiny house toilet, Dry camping trailer toilet, Shunpiking trailer toilet, DiY composting toilet, Building a trailer toilet, DiY trailer toilet, Ninja trailer toilet, Dry camping toilet, Boondocking toilet, Mobile Eco-communalism, Workamping toilet, Housetrucker toilet, Dispersed Camping toilet, Allstays toilet, Peace convoy toilet.
Friday, January 1, 2016
Building a foam and cloth monocoque shell on your trailer
So now we get to the meat of our build: how do we insulate and enclose our homebuilt boondocking trailer? One of the biggest issues with homebuilt dry camping trailers is weight. Most of us aren't welders or metalworkers, so steel and aluminum are not good options. Wood is not nearly as strong and is heavier. Weight determines what kinds of hitches and vehicles can pull your trailer build, and the weight you pile on in your build reduces what you can store inside your stealthly tiny house. In addition, you want to keep your tiny house trailer comfy, and that means insulation.
One simple solution is to go retro and use a monocoque shell on the trailer, and that's what we are doing here. Although insulating foam has very little structural integrity by itself, it is frequently used as the supporting structure for surfboards and model planes that are then covered in fiberglas resin, to build very strong structures. World war I and II aircraft like biplanes and spitfires used cloth and glue over plywood to form extremely light and strong monocoque airframes. This same lost technology is an inexpensive way to build a strong, light, insulating shell for our stealth tiny house.
 So here we have a fairly common 2" foam panel, which I've perforated with a wallpaper removal tool to give the glue a strong bonding surface.

Foam, glue, and a linen bed sheet. Nothing to see here folks. We'll just glue these together and after it dries, I'll beat on it with a sledgehammer....
 So when it finally fails, what happens is the cloth and glue shear at the point of impact and the foam blows out under the load. What will happen when the foam is backed with plywood? It will be even stronger. Preparation of the foam surface is critical to getting good results, which is why I used a paper tiger-type perforator to open up the surface. Without good glue adhesion the foam would just pop away from the cloth on the first hit and both would fail immediately. The tiny holes give the glue tremendous gripping strength.


When you are doing entire 4x8 panels, you need a paint roller to manage the gluing process. We used Titebond II by the gallon, about 3 gallons total; I ordered military surplus oversized bed sheets, and we used 12 of these king-size-plus sheets. The linen is tucked behind the top of the panel and smoothed downwards onto the glue, using your shoe to provide tension on the bottom of the linen sheet while you smooth out bubbles and get the sheet glued down. This embeds the linen sheet into the glue and saturates the cloth. You may have to pull the cloth off in places and re-lay it to smooth out some of the bubbles that are trapped under the cloth.
Rotate the panel 180 degrees and glue down what was the bottom edge, and glue the remaining sides, and work out any bubbles you can see. A second layer of glue is then rolled over the linen and it is set aside to dry for a day. Be careful to use spacers between panes that are drying. Even panels that seem dry can glue themselves together if you aren't careful and separating them is a pain in the ass.
Once they were dry, we attached the plain-backed side to the plywood shell of our stealth trailer with liquid nails (heavy duty) and held it on with Lag screws passed through 2" washers. Lags that are removed have expanding foam put into the holes to further tie the panel together and waterproof the shell.

Any exposed edge will get a plastic drywall bullnose glued onto it before the final layer of linen is glued on, but it is remarkably tough and light all by itself.
It's important to note that in our build I used 2.5" lags liberally, and any lags driven into the plywood shell alone were removed after the Liquid Nails dried, and their holes were foamed. Lags into 2x4 lumber were driven until they dished the skin below flush, and thelag head and washer were foamed over. Points where panels met had Gorilla glue injected into the gap and then expanding foam over that to fill in the gaps to the surface. The dried foam was then trimmed flush when it dried so than the last layer of linen would lay smooth over it.
 The completed stealth trailer shell is painted with any heavy-duty high pigment paint; we use concrete paint with good results but pretty much anything waterproof will do. We will focus next on the composting toilet build and our thinking on how to integrate a toilet into a boondocking tiny house.
Copyright © 2016
Tags: Monocoque trailer design, Monocoque trailer shell, Linen over foam enclosed trailer, Enclosing a harbor freight trailer, Building a foam shell, Monocoque tiny house, Semi-monocoque trailer design, Foam shelled trailer, Monocoque stealth trailer, Insulating a tiny house, Monocoque ninja trailer, Enclosing a HF trailer, Enclosing a trailer, Insulating a trailer, How to enclose a trailer. Lightweight trailer box, Featherweight trailer box.
One simple solution is to go retro and use a monocoque shell on the trailer, and that's what we are doing here. Although insulating foam has very little structural integrity by itself, it is frequently used as the supporting structure for surfboards and model planes that are then covered in fiberglas resin, to build very strong structures. World war I and II aircraft like biplanes and spitfires used cloth and glue over plywood to form extremely light and strong monocoque airframes. This same lost technology is an inexpensive way to build a strong, light, insulating shell for our stealth tiny house.


Foam, glue, and a linen bed sheet. Nothing to see here folks. We'll just glue these together and after it dries, I'll beat on it with a sledgehammer....


Rotate the panel 180 degrees and glue down what was the bottom edge, and glue the remaining sides, and work out any bubbles you can see. A second layer of glue is then rolled over the linen and it is set aside to dry for a day. Be careful to use spacers between panes that are drying. Even panels that seem dry can glue themselves together if you aren't careful and separating them is a pain in the ass.
Once they were dry, we attached the plain-backed side to the plywood shell of our stealth trailer with liquid nails (heavy duty) and held it on with Lag screws passed through 2" washers. Lags that are removed have expanding foam put into the holes to further tie the panel together and waterproof the shell.
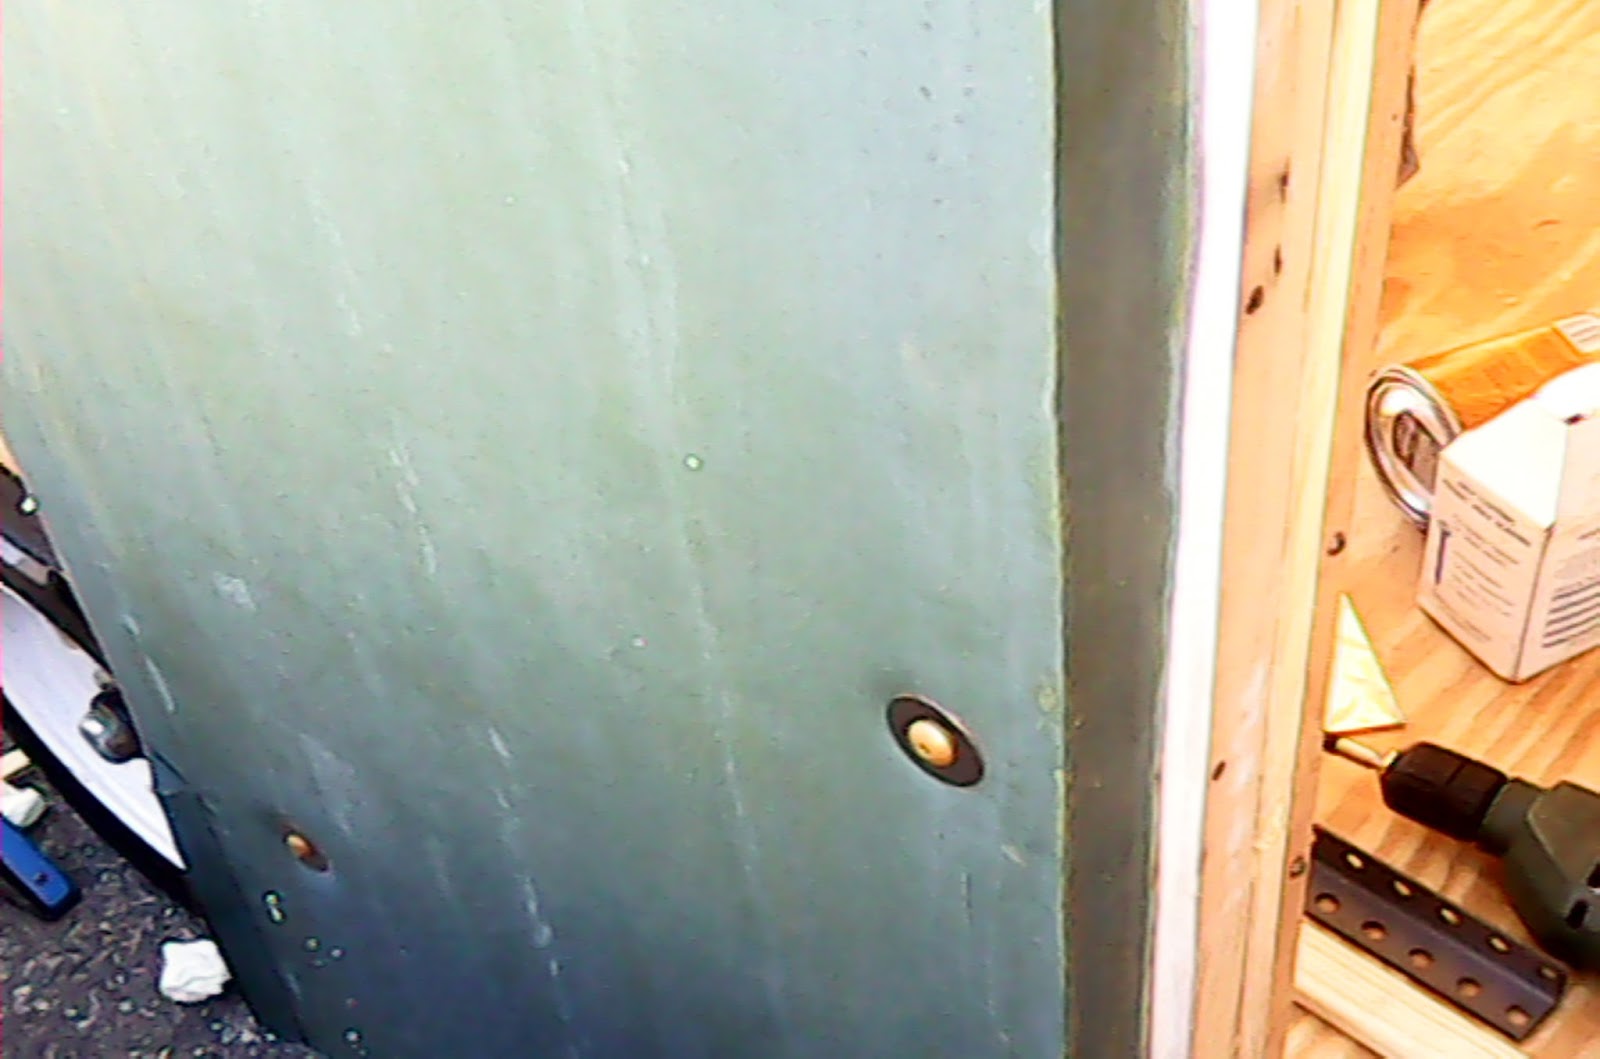
Any exposed edge will get a plastic drywall bullnose glued onto it before the final layer of linen is glued on, but it is remarkably tough and light all by itself.
It's important to note that in our build I used 2.5" lags liberally, and any lags driven into the plywood shell alone were removed after the Liquid Nails dried, and their holes were foamed. Lags into 2x4 lumber were driven until they dished the skin below flush, and thelag head and washer were foamed over. Points where panels met had Gorilla glue injected into the gap and then expanding foam over that to fill in the gaps to the surface. The dried foam was then trimmed flush when it dried so than the last layer of linen would lay smooth over it.

Copyright © 2016
Tags: Monocoque trailer design, Monocoque trailer shell, Linen over foam enclosed trailer, Enclosing a harbor freight trailer, Building a foam shell, Monocoque tiny house, Semi-monocoque trailer design, Foam shelled trailer, Monocoque stealth trailer, Insulating a tiny house, Monocoque ninja trailer, Enclosing a HF trailer, Enclosing a trailer, Insulating a trailer, How to enclose a trailer. Lightweight trailer box, Featherweight trailer box.
Subscribe to:
Posts (Atom)